นอกจากจะคอนฟิกแชร์ไฟล์ให้เครื่องอื่นที่รัน Windows สามารถเข้ามา Map Drive เพื่อเก็บไฟล์ไว้บนเซิร์ฟเวอร์ลีนุกซ์ได้แล้ว
Samba 4 ยังสามารถคอนฟิกให้เป็น Active Directory Domain Controller เพื่อควบคุมสิทธิ์ เช่นเก็บ Username, Password สำหรับการล็อกอินก่อนใช้งานเครื่อง Windows ที่เป็นสมาชิก (member) ของ Domain ได้
ลองมาดูวิธีการติดตั้งและคอนฟิกกัน
เนื่องจากปัญหาเรื่องแพ็คเกจใน Yum repo ของทั้ง CentOS 6 และ CentOS 7 ซึ่งยังไม่มีแพ็คเกจ rpm อย่างเป็นทางการ ในการคอนฟิกเป็น Domain Controller ในที่นี้จะขอเปลี่ยนมาใช้ Ubuntu 16.04
ชุดซอฟต์แวร์ที่เลือกตอนติดตั้ง Ubuntu 16.04
[*] standard system utilities
[*] OpenSSH server
ตอนติดตั้ง Ubuntu แนะนำให้ใส่ชื่อ hostname แบบเต็ม คือมีทั้งชื่อเครื่องและชื่อโดเมนเนม เราจะใช้ชื่อนี้ในการคอนฟิก Kerberos และ Samba
ข้อมูลเครื่องที่ใช้ในการทดลองติดตั้ง Samba 4
admin@samba4:~$ hostnamectl
   Static hostname: samba4.example.com
         Icon name: computer-vm
           Chassis: vm
        Machine ID: ...
           Boot ID: ...
  Operating System: Ubuntu 16.04.1 LTS
            Kernel: Linux 4.4.0-38-generic
      Architecture: x86-64
IP ของเครื่องเซิร์ฟเวอร์คือ 192.168.56.16
ทดลอง ping ชื่อ hostname ต้อง ping ได้
admin@samba4:~$ ping samba4.example.com
PING samba4.example.com (127.0.1.1) 56(84) bytes of data.
64 bytes from samba4.example.com (127.0.1.1): icmp_seq=1 ttl=64 time=0.015 ms
64 bytes from samba4.example.com (127.0.1.1): icmp_seq=2 ttl=64 time=0.021 ms
64 bytes from samba4.example.com (127.0.1.1): icmp_seq=3 ttl=64 time=0.020 ms
^C
กด [Ctrl]+[c] เพื่อยกเลิกการ ping
ติดตั้งแพ็คเกจ samba
ใช้คำสั่ง apt install เพื่อติดตั้งแพ็คเกจ samba krb5-config winbind
admin@ubuntu:~$ sudo apt install samba krb5-config winbind
ติดตั้งไปสักพัก จะมีหน้าจอคอนฟิก Kerberos Authentication ขึ้นมา
คอนฟิกชื่อ realm ของ Kerberos ให้ใส่ชื่อโดเมนเนมของเครื่อง แต่พิมพ์เป็นตัวพิมพ์ใหญ่ เช่นในเครื่องที่กำลังคอนฟิกนี้ชื่อโดเมนเนมคือ example.com ก็ให้ใส่ชื่อ Realm เป็น EXAMPLE.COM
┌──────────────────┤ Configuring Kerberos Authentication ├─
│ When users attempt to use Kerberos and specify a principal or
│ without specifying what administrative Kerberos realm that
│ belongs to, the system appends the default realm. The default
│ also be used as the realm of a Kerberos service running on the
│ machine. Often, the default realm is the uppercase version of
│ DNS domain.
│
│ Default Kerberos version 5 realm:
│
│ EXAMPLE.COM___________________________________________________
│
│                                 <Ok>
│
└────────────────────────────────────────────────────
ใส่ชื่อเซิร์ฟเวอร์ของ Kerberos ในที่นี้ Kerberos รันอยู่บนเครื่องเดียวกัน ก็ให้ใส่ชื่อเครื่องลงไป
┌────────────────┤ Configuring Kerberos Authentication ├─
│ Enter the hostnames of Kerberos servers in the EXAMPLE.COM
│ realm separated by spaces.
│
│ Kerberos servers for your realm:
│
│ samba4.example.com__________________________________________
│
│                                  <Ok>
│
└───────────────────────────────────────────────────
ใส่ชื่อเครื่อง (hostname) ของเซิร์ฟเวอร์ ที่ใช้ในการบริหารจัดการ Kerberos (เช่นการเปลี่ยนรหัสผ่าน)
┌──────────────────┤ Configuring Kerberos Authentication ├─
│ Enter the hostname of the administrative (password changing)
│ the EXAMPLE.COM Kerberos realm.
│
│ Administrative server for your Kerberos realm:
│
│ samba4.example.com___________________________________________
│
│                                   <Ok>
│
└────────────────────────────────────────────────────
หลังจาก apt ติดตั้งแพ็คเกจแล้วเสร็จ ให้ย้ายไฟล์ smb.conf เดิมไปเป็นชื่ออื่น เช่น smb.conf.org เพราะเราจะใช้คำสั่ง samba-tool ในการสร้างคอนฟิกไฟล์ใหม่
admin@ubuntu:~$ sudo mv /etc/samba/smb.conf /etc/samba/smb.conf.org
รันคำสั่ง samba-tool เพื่อสร้างไฟล์ smb.conf ขึ้นมาใหม่ ค่าที่ใส่โดยดีฟอลต์จะอยู่ในวงเล็บสี่เหลี่ยม [] โดยส่วนใหญ่สามารถกดปุ่ม [Enter] ผ่านไปได้เลย
admin@ubuntu:~$ sudo samba-tool domain provision
Realm [EXAMPLE.COM]:
 Domain [EXAMPLE]:
 Server Role (dc, member, standalone) [dc]:
 DNS backend (SAMBA_INTERNAL, BIND9_FLATFILE, BIND9_DLZ, NONE) [SAMBA_INTERNAL]:
 DNS forwarder IP address (write 'none' to disable forwarding) [192.168.56.1]:
Administrator password: # ใส่รหัสผ่าน Administrator ของ AD Domain
Retype password:        # ใส่รหัสผ่านอีกครั้ง
Looking up IPv4 addresses
More than one IPv4 address found. Using 192.168.56.16
Looking up IPv6 addresses
No IPv6 address will be assigned
Setting up secrets.ldb
Setting up the registry
Setting up the privileges database
Setting up idmap db
Setting up SAM db
Setting up sam.ldb partitions and settings
Setting up sam.ldb rootDSE
Pre-loading the Samba 4 and AD schema
Adding DomainDN: DC=example,DC=com
Adding configuration container
Setting up sam.ldb schema
Setting up sam.ldb configuration data
Setting up display specifiers
Modifying display specifiers
Adding users container
Modifying users container
Adding computers container
Modifying computers container
Setting up sam.ldb data
Setting up well known security principals
Setting up sam.ldb users and groups
Setting up self join
Adding DNS accounts
Creating CN=MicrosoftDNS,CN=System,DC=example,DC=com
Creating DomainDnsZones and ForestDnsZones partitions
Populating DomainDnsZones and ForestDnsZones partitions
Setting up sam.ldb rootDSE marking as synchronized
Fixing provision GUIDs
A Kerberos configuration suitable for Samba 4 has been generated at /var/lib/samba/private/krb5.conf
Once the above files are installed, your Samba4 server will be ready to use
Server Role:       active directory domain controller
Hostname:          samba4
NetBIOS Domain:    EXAMPLE
DNS Domain:        example.com
DOMAIN SID:        S-1-5-21-...-...-...
หมายเหตุ หากตอนรัน samba-tool แล้วขึ้นข้อความ error แบบด้านล่างนี้ แปลว่าคุณใส่รหัสผ่านของ Administrator ง่ายเกินไป ไม่เป็นไปตามเงื่อนไขขั้นต่ำที่ตั้งไว้ ให้รันคำสั่ง samba-tool อีกครั้งแต่ระบุรหัสผ่านให้ยากขึ้น
ERROR(ldb): uncaught exception - 0000052D: Constraint violation - check_password_restrictions: the password does not meet the complexity criteria!
 File "/usr/lib/python2.7/dist-packages/samba/netcmd/__init__.py", line 175, in _run
 return self.run(*args, **kwargs)
 File "/usr/lib/python2.7/dist-packages/samba/netcmd/domain.py", line 442, in run
 nosync=ldap_backend_nosync, ldap_dryrun_mode=ldap_dryrun_mode)
 File "/usr/lib/python2.7/dist-packages/samba/provision/__init__.py", line 2172, in provision
 skip_sysvolacl=skip_sysvolacl)
 File "/usr/lib/python2.7/dist-packages/samba/provision/__init__.py", line 1795, in provision_fill
 next_rid=next_rid, dc_rid=dc_rid)
 File "/usr/lib/python2.7/dist-packages/samba/provision/__init__.py", line 1453, in fill_samdb
 "KRBTGTPASS_B64": b64encode(krbtgtpass.encode('utf-16-le'))
 File "/usr/lib/python2.7/dist-packages/samba/provision/common.py", line 55, in setup_add_ldif
 ldb.add_ldif(data, controls)
 File "/usr/lib/python2.7/dist-packages/samba/__init__.py", line 225, in add_ldif
 self.add(msg, controls)
copy ไฟล์ krb5.conf ไปไว้ใน /etc
admin@ubuntu:~$ sudo cp /var/lib/samba/private/krb5.conf /etc
ใช้คำสั่ง systemctl restart เพื่อรีสตาร์ตเซอร์วิส smbd และ samba-ad-dc
admin@ubuntu:~$ sudo systemctl restart smbd samba-ad-dc
ใช้คำสั่ง samba-tool ระบุออปชัน domain level show เพื่อแสดงสถานะของ Domain Controller
admin@ubuntu:~$ sudo samba-tool domain level show
Domain and forest function level for domain 'DC=example,DC=com'

Forest function level: (Windows) 2008 R2
Domain function level: (Windows) 2008 R2
Lowest function level of a DC: (Windows) 2008 R2
ตัวอย่างโปรเซสของ Samba 4 ที่คอนฟิกรันเป็น Active Directory Domain Controlller
admin@ubuntu:~$ ps -ef
UID    PID  PPID  C STIME TTY   TIME CMD
...
root  8442     1  0 11:21 ? 00:00:00 /usr/sbin/nmbd -D
root  8585     1  0 11:21 ? 00:00:00 /usr/sbin/winbindd
root  8588  8585  0 11:21 ? 00:00:00 /usr/sbin/winbindd
root  8826  8585  0 11:27 ? 00:00:00 /usr/sbin/winbindd
root  8827  8585  0 11:27 ? 00:00:00 /usr/sbin/winbindd
root  8946     1  0 11:30 ? 00:00:00 /usr/sbin/samba -D
root  8947  8946  0 11:30 ? 00:00:00 /usr/sbin/samba -D
root  8948  8946  0 11:30 ? 00:00:00 /usr/sbin/samba -D
root  8949  8946  0 11:30 ? 00:00:00 /usr/sbin/samba -D
root  8950  8946  0 11:30 ? 00:00:00 /usr/sbin/samba -D
root  8951  8946 13 11:30 ? 00:00:02 /usr/sbin/samba -D
root  8952  8947  0 11:30 ? 00:00:00 /usr/sbin/smbd -D --option=serve
root  8953  8946  0 11:30 ? 00:00:00 /usr/sbin/samba -D
root  8954  8946  0 11:30 ? 00:00:00 /usr/sbin/samba -D
root  8955  8946  0 11:30 ? 00:00:00 /usr/sbin/samba -D
root  8957  8946  0 11:30 ? 00:00:00 /usr/sbin/samba -D
root  8959  8946  0 11:30 ? 00:00:00 /usr/sbin/samba -D
root  8960  8946  0 11:30 ? 00:00:00 /usr/sbin/samba -D
root  8961  8946  0 11:30 ? 00:00:00 /usr/sbin/samba -D
root  8965  8952  0 11:30 ? 00:00:00 /usr/sbin/smbd -D --option=serve
root  8967  8952  0 11:30 ? 00:00:00 /usr/sbin/smbd -D --option=serve
เพิ่ม user ใน Active Directory
ใช้คำสั่ง samba-tool user add ระบุชื่อ username ที่ต้องการเพิ่ม
admin@ubuntu:~$ sudo samba-tool user add alice
New Password:
Retype Password:
ERROR(ldb): Failed to add user 'alice': - 0000052D: Constraint violation - check_password_restrictions: the password does not meet the complexity criteria!
หากขึ้นข้อความ error แบบด้านบน แสดงว่าตั้งรหัสผ่าน (password) ง่ายเกินไป ต้องรันคำสั่งใหม่ แล้วระบุรหัสให้ยากขึ้น
admin@ubuntu:~$ sudo samba-tool user add alice
New Password:
Retype Password:
User 'alice' created successfully
คอนฟิก Windows 7 ให้เข้าเป็นสมาชิก (join) Domain
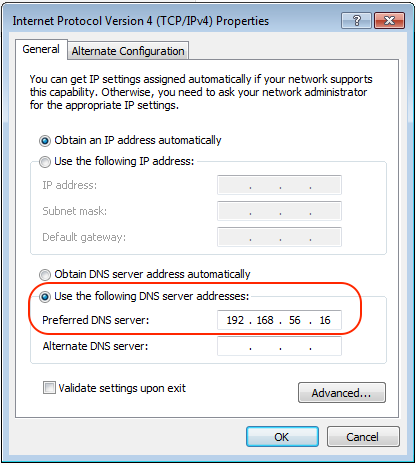
แก้ไข DNS server ของเครื่อง Windows 7 ให้ชี้มาที่ IP ของเซิรฟ์เวอร์ที่รัน Samba 4
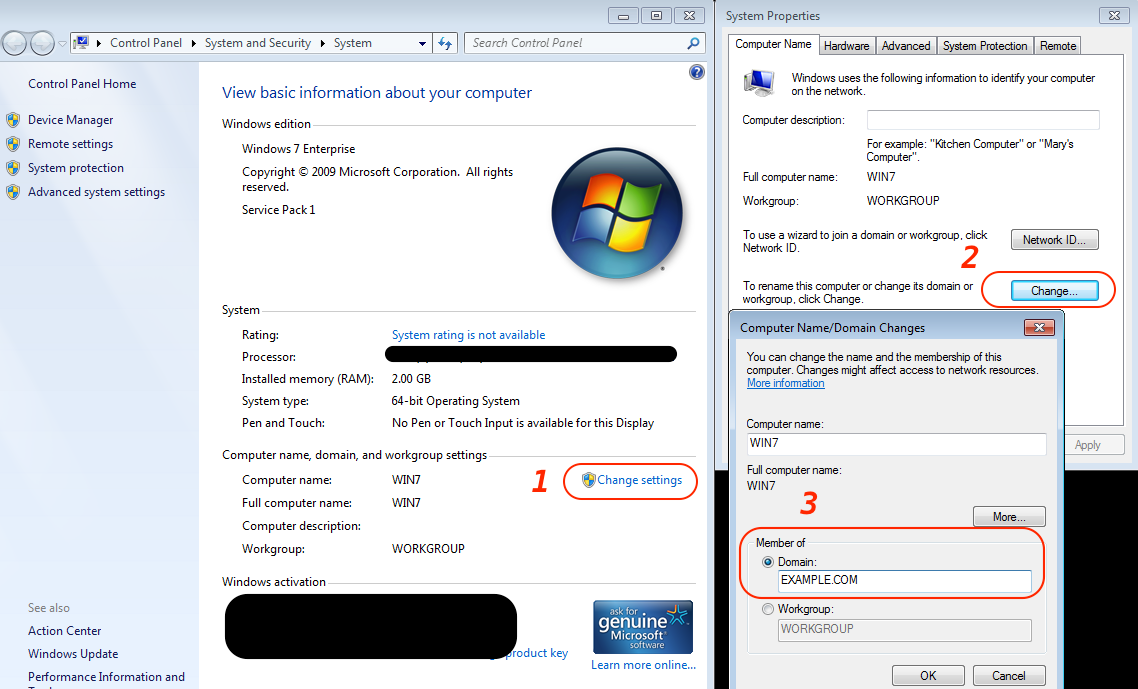
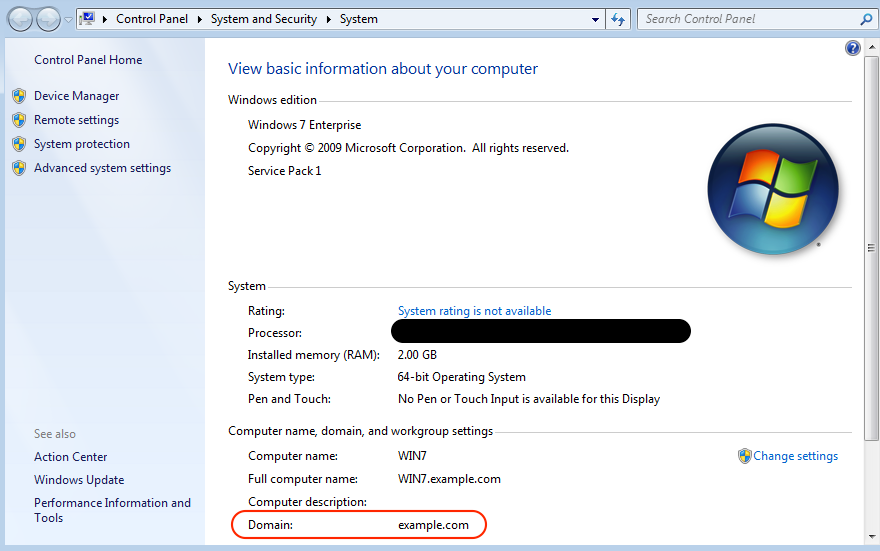
คลิกขวาที่ไอคอน Computer แล้วเลือก Properties หรือเข้าเมนู Control Panel -> System and Security -> System
คลิก (1) Change settings แล้วคลิกปุ่ม (2) Change แล้วเลือก (3) Member of เป็น Domain ใส่ชื่อโดเมนเป็น EXAMPLE.COM แล้วกดปุ่ม OK
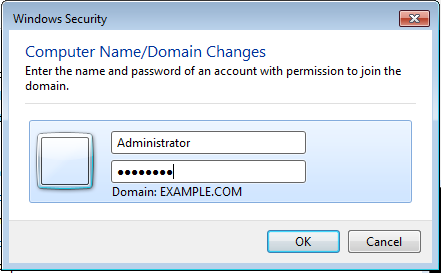
ใส่ Administrator และรหัสผ่านที่ตั้งไว้ตอนรันคำสั่ง samba-tool domain provision
หากใส่ถูกต้องจะขึ้นข้อความ Welcome to the EXAMPLE.COM domain
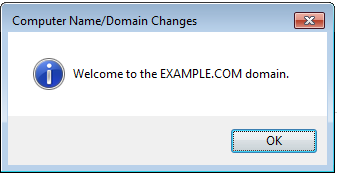
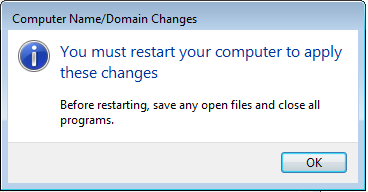
กดปุ่ม OK จะมีข้อความขึ้นให้รีสตาร์ตเครื่อง กดปุ่ม OK เพื่อรีสตาร์ต
หน้าจอ Windows 7 หลังจากเป็นสมาชิก Domain
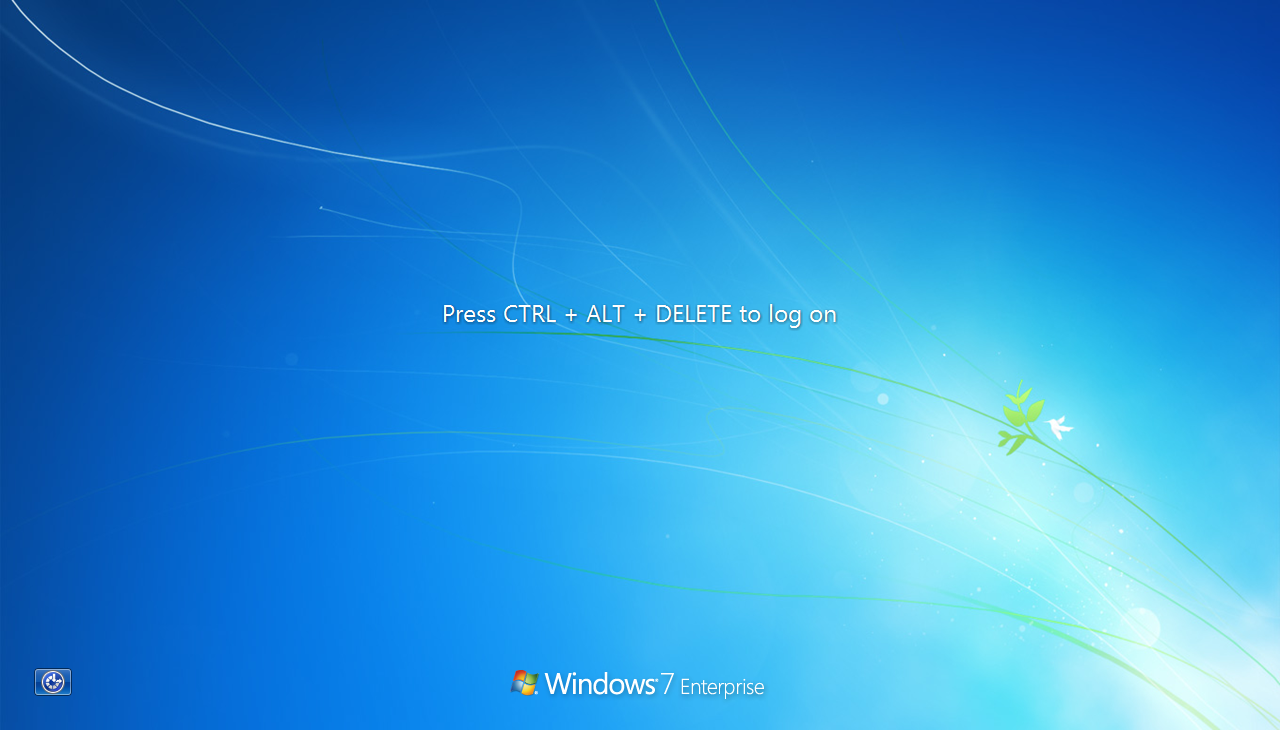
กดปุ่ม [Ctrl] + [Alt] + [Delete] เพื่อเข้าสู่หน้าจอ Log on
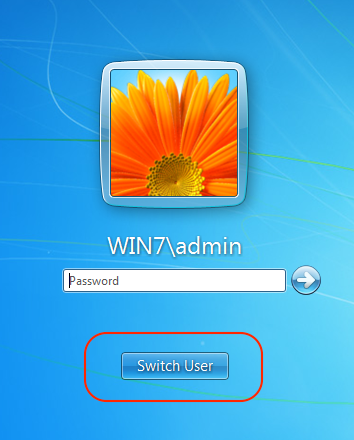
หากไม่เคย Log on เข้า Domain มาก่อน จะขึ้นหน้าจอให้ล็อกเข้าเครื่องตัวเอง (ชื่อเครื่อง WIN7)
ต้องกดปุ่ม Switch User
ใส่ Username และ Password ที่สร้างไว้ด้วยคำสั่ง samba-tool user add
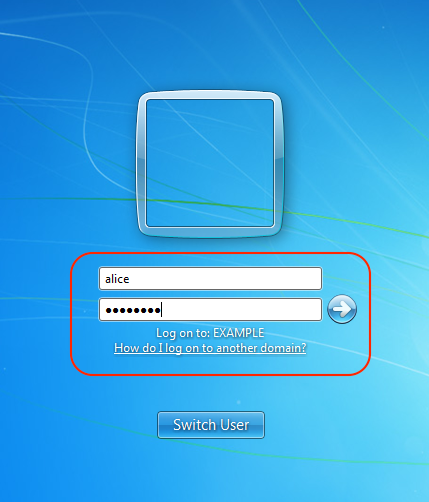
หากใส่ถูกต้อง ก็สามารถล็อกอินเข้าเครื่องได้
ตัวอย่างข้อมูล Domain ที่เครื่อง Windows 7 เป็นสมาชิกอยู่
ลองไปคอนฟิกกันดูนะครับ แต่แนะนำให้ทดสอบในเครือข่าย (network) แยกต่างหากจากระบที่ใช้งานอยู่ เพราะอาจมีปัญหาเรื่อง NetBIOS Domain
ได้ผลลัพธ์หรือติดปัญหาอะไรสามารถโพสต์ถามได้นะครับ