สิ่งที่เปลี่ยนแปลงไปอีกอย่างใน CentOS 7 หรือ Red Hat 7 ก็คือเปลี่ยนมาใช้ MariaDB เพื่อเป็นเซิร์ฟเวอร์ฐานข้อมูลแทนที่ MySQL ซึ่งผู้ใช้งานแทบไม่ต้องเปลี่ยนอะไร เพราะรูปแบบการใช้งาน เช่นชื่อคำสั่ง ออปชันที่ใช้ยังคงเหมือนเดิม
คนสร้างและพัฒนา MariaDB ก็คือคนเดิมที่เคยสร้างและพัฒนา MySQL มาก่อน ขอไม่กล่าวถึงเหตุผลหรือรายละเอียดในที่นี้ แต่สรุปคร่าวๆ ว่า MariaDB สามารถใช้งานได้ฟรี (GPL) มีคุณสมบัติให้ใช้งานเช่น Storage Engine มากขึ้น ว่ากันว่าประสิทธิภาพดีขึ้น ทำให้หลายๆ ที่ เริ่มเปลี่ยนมาใช้ MariaDB กันแล้ว
ลองมาดูวิธีการติดตั้งเซิร์ฟเวอร์ MariaDB บน CentOS 7 กัน และวิธีการคอนฟิกเซิร์ฟเวอร์ฐานข้อมูลเบื้องต้นว่าเหมือนเดิมขนาดไหน
การติดตั้งเซิร์ฟเวอร์ mariadb บน CentOS 7 ต้องติดตั้งแพ็กเกจชื่อ mariadb-server ซึ่งจะติดตั้งแพ็กเกจชื่อ mariadb ที่มีโปรแกรมฝั่งไคลเอนต์ด้วย
ใช้คำสั่ง yum install เพื่อติดตั้ง mariadb-server
[root@cent7 ~]# yum install mariadb-server
สตาร์ตเซอร์วิส mariadb
[root@cent7 ~]# systemctl start mariadb
ลองใช้คำสั่ง ps เพื่อดูชื่อโปรเซส ก็ยังคงเป็น mysqld
[root@cent7 ~]# ps -ef | grep mysql
mysql    2600    1 0 21:06 ?   00:00:00 /bin/sh /usr/bin/mysqld_safe --basedir=/usr
mysql    2758 2600 0 21:06 ?   00:00:00 /usr/libexec/mysqld --basedir=/usr --datadir=/var/lib/mysql --plugin-dir=/usr/lib64/mysql/plugin --log-error=/var/log/mariadb/mariadb.log --pid-file=/var/run/mariadb/mariadb.pid --socket=/var/lib/mysql/mysql.sock
ดีฟอลต์ไดเรกทอรีในการเก็บไฟล์ฐานข้อมูลก็ยังใช้ /var/lib/mysql/
[root@cent7 ~]# ls -l /var/lib/mysql/
total 36892
-rw-rw----. 1 mysql mysql    16384 Jul 23 21:06 aria_log.00000001
-rw-rw----. 1 mysql mysql       52 Jul 23 21:06 aria_log_control
-rw-rw----. 1 mysql mysql 18874368 Jul 23 21:06 ibdata1
-rw-rw----. 1 mysql mysql  5242880 Jul 23 21:06 ib_logfile0
-rw-rw----. 1 mysql mysql  5242880 Jul 23 21:06 ib_logfile1
drwx------. 2 mysql mysql     4096 Jul 23 21:06 mysql
srwxrwxrwx. 1 mysql mysql        0 Jul 23 21:06 mysql.sock
drwx------. 2 mysql mysql     4096 Jul 23 21:06 performance_schema
drwx------. 2 mysql mysql        6 Jul 23 21:06 test
คำสั่งไคลเอนต์ยอดนิยมที่ใช้เชื่อมต่อเข้าฐานข้อมูลก็ยังคงเป็นคำสั่ง mysql
ตัวอย่างหน้าจอการใช้งานคำสั่ง mysql

หมายเหตุ การออกจากคำสั่ง mysql ให้พิมพ์คำสั่ง quit แล้ว [Enter]
ดีฟอลต์คอนฟิกจากติดตั้ง การรันคำสั่ง mysql ผู้ใช้งานไม่ต้องระบุ username, password ในการเข้าใช้ฐานข้อมูลเหมือนเดิม แถมยังได้สิทธิ์ root (ของฐานข้อมูล) ด้วย ซึ่งอันตรายมาก
MariaDB [(none)]> SELECT USER();
+----------------+
| USER()         |
+----------------+
| root@localhost |
+----------------+
1 row in set (0.00 sec)
แนะนำหลังการติดตั้งทุกครั้งไม่ว่าจะเป็น MariaDB หรือ MySQL ให้รันคำสั่ง mysql_secure_installation เพื่อคอนฟิกฐานข้อมูลเบื้องต้น เช่นตั้งรหัสผ่านของ root
ตัวอย่างการรันคำสั่ง mysql_secure_installation
[root@cent7 ~]# /usr/bin/mysql_secure_installation
/usr/bin/mysql_secure_installation: line 379: find_mysql_client: command not found

NOTE: RUNNING ALL PARTS OF THIS SCRIPT IS RECOMMENDED FOR ALL MariaDB
      SERVERS IN PRODUCTION USE! PLEASE READ EACH STEP CAREFULLY!

In order to log into MariaDB to secure it, we'll need the current
password for the root user. If you've just installed MariaDB, and
you haven't set the root password yet, the password will be blank,
so you should just press enter here.

Enter current password for root (enter for none): <-- ใส่รหัสผ่านเดิม ถ้าเพิ่งติดตั้งยังไม่มีรหัสผ่าน ให้ [Enter] ผ่านไป
OK, successfully used password, moving on...

Setting the root password ensures that nobody can log into the MariaDB
root user without the proper authorisation.

Set root password? [Y/n] y <-- ตอบ y เพื่อเซตรหัสผ่านให้ root (ในที่นี้คือ root ของ MariaDB ไม่ใช่ root ของลีนุกซ์)
New password:              <-- พิมพ์รหัสผ่านใหม่ เวลาพิมพ์จะไม่ขึ้นตัวอักษรใดๆ
Re-enter new password:     <-- พิมพ์รหัสผ่านใหม่อีกครั้ง
Password updated successfully!
Reloading privilege tables..
 ... Success!

By default, a MariaDB installation has an anonymous user, allowing anyone
to log into MariaDB without having to have a user account created for
them. This is intended only for testing, and to make the installation
go a bit smoother. You should remove them before moving into a
production environment.

Remove anonymous users? [Y/n] y <-- ตอบ y เพื่อลบการใช้งานแบบไม่ต้องระบุผู้ใช้
 ... Success!

Normally, root should only be allowed to connect from 'localhost'. This
ensures that someone cannot guess at the root password from the network.

Disallow root login remotely? [Y/n] y <-- ตอบ y เพื่อปิดการล็อกอินด้วย root จากเครื่องอื่น
 ... Success!

By default, MariaDB comes with a database named 'test' that anyone can
access. This is also intended only for testing, and should be removed
before moving into a production environment.

Remove test database and access to it? [Y/n] y <-- ตอบ y เพื่อลบชื่อฐานข้อมูล test
 - Dropping test database...
 ... Success!
 - Removing privileges on test database...
 ... Success!

Reloading the privilege tables will ensure that all changes made so far
will take effect immediately.

Reload privilege tables now? [Y/n] y <-- ตอบ y เพื่อรีโหลดตารางสิทธิ์การใช้งานให้มีผลทันที
 ... Success!
Cleaning up...

All done! If you've completed all of the above steps, your MariaDB
installation should now be secure.

Thanks for using MariaDB!
ตอนนี้ก็ไม่สามารถเข้าเซิร์ฟเวอร์ฐานข้อมูลแบบไม่ระบุรหัสผ่านได้แล้ว
[root@cent7 ~]# mysql
ERROR 1045 (28000): Access denied for user 'root'@'localhost' (using password: NO)
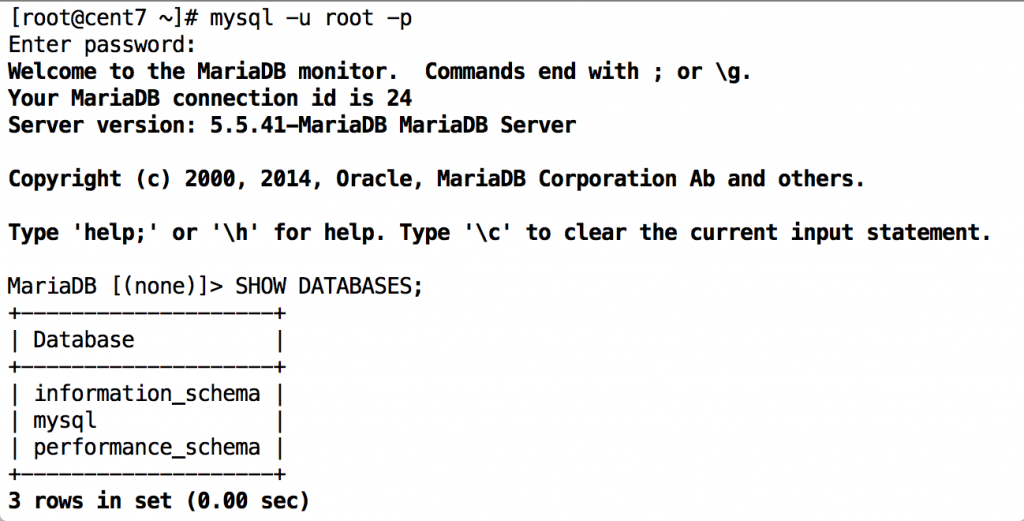
ตัวอย่างการระบุชื่อผู้ใช้ -u root และระบุออปชัน -p ให้ขึ้นถามรหัสผ่าน
[root@cent7 ~]# mysql -u root -p
Enter password:
Welcome to the MariaDB monitor. Commands end with ; or \g.
Your MariaDB connection id is 20
Server version: 5.5.41-MariaDB MariaDB Server

Copyright (c) 2000, 2014, Oracle, MariaDB Corporation Ab and others.

Type 'help;' or '\h' for help. Type '\c' to clear the current input statement.

MariaDB [(none)]>