ได้ยินชื่อและคุณสมบัติต่างๆ ของ Kubernetes มานาน แต่ไม่ได้ลองใช้สักที พอได้โอกาสไปดูเดโมในงาน #DevOpsBKK2018 เห็นแล้วมีความน่าสนใจ เลยลองศึกษาหาวิธีการติดตั้งและคอนฟิกเบื้องต้น เผื่อจะมีประโยขน์เป็นแนวทางเริ่มต้นกับผู้สนใจ Kubernetes ได้ไปทดลองเล่นกัน
เท่าที่ศึกษาดู มีหลายวิธีที่จะติดตั้งและคอนฟิก Kubernetes ในที่นี้จะขอเรียบเรียงเป็นวิธี ที่คิดว่าน่าจะตรงไปตรงมาที่สุด เพื่อจะได้ไม่ต้องติดตั้งแพ็คเกจอื่นๆ มากเกินไป โดยจะทดลองติดตั้งและคอนฟิกบน Ubuntu 18.04 จำนวน 3 เครื่อง เพื่อสร้างเป็น Kubernetes Cluster
ในที่นี้ทดลองใน VirtualBox โดยติดตั้ง Ubuntu 18.04 และคอนฟิกเน็ตเวิร์กของ 3 เครื่องดังนี้
- node1 : ip 192.168.1.101 คอนฟิกเป็น Master
- node2 : ip 192.168.1.102
- node3 : ip 192.168.1.103
ติดตั้งและคอนฟิกบนทุกเครื่องที่จะอยู่ใน Cluster
ในหัวข้อนี้จะเป็นการรันคำสั่งเพื่อติดตั้งและคอนฟิกโปรแกรม โดยต้องทำบนทุกเครื่องที่จะอยู่ใน Kubernetes Cluster
เนื่องจาก Kubernetes ทำงานโดยใช้ Docker เป็นหลัก ดังนั้นเริ่มต้นด้วยการติดตั้ง Docker บนทุกเครื่อง โดยสามารถดูวิธีการได้ที่ ติดตั้ง Docker CE บน Ubuntu 18.04
ตัวอย่างการรันคำสั่ง docker version หลังการติดตั้ง Docker CE
alice@ALL:~$ docker version
Client:
 Version: 18.06.1-ce
 API version: 1.38
 Go version: go1.10.3
 Git commit: e68fc7a
 Built: Tue Aug 21 17:24:51 2018
 OS/Arch: linux/amd64
 Experimental: false

Server:
 Engine:
  Version: 18.06.1-ce
  API version: 1.38 (minimum version 1.12)
  Go version: go1.10.3
  Git commit: e68fc7a
  Built: Tue Aug 21 17:23:15 2018
  OS/Arch: linux/amd64
  Experimental: false
การใช้งาน Kubernetes ต้องปิดการใช้ swap ของทุกเครื่อง
รันคำสั่ง swapoff -a บนทุกเครื่อง
alice@ALL:~$ sudo swapoff -a
เพื่อปิดการใช้งาน swap ถ้าหากมีการรีบู๊ตเครื่องใหม่ ต้องแก้ไขไฟล์ /etc/fstab โดยใส่เครื่องหมาย # นำหน้าบรรทัดคอนฟิก swap บนทุกเครื่อง
alice@ALL:~$ sudo vi /etc/fstab
UUID=aa5b5d92-b3d5-11e8-bdd0-080027f41685 / ext4 defaults 0 0
#/swap.img  none    swap    sw  0    0
บนทุกเครื่องให้รันคำสั่งต่อไปนี้ เพื่อติดตั้ง Repositories ของ Kubernetes
alice@ALL:~$ sudo apt update

alice@ALL:~$ sudo apt install -y apt-transport-https

alice@ALL:~$ curl -s \
    https://packages.cloud.google.com/apt/doc/apt-key.gpg |\
    sudo apt-key add -

alice@ALL:~$ sudo touch /etc/apt/sources.list.d/kubernetes.list

alice@ALL:~$ echo \
    "deb http://apt.kubernetes.io/ kubernetes-xenial main" |\
    sudo tee -a /etc/apt/sources.list.d/kubernetes.list
ติดตั้งแพ็คเกจ kubeadm
alice@ALL:~$ sudo apt update
alice@ALL:~$ sudo apt install -y kubeadm
...
The following additional packages will be installed:
  cri-tools kubectl kubelet kubernetes-cni socat
การติดตั้งแพ็คเกจ kubeadm จะติดตั้ง kubectl kubectl และอื่นๆ ที่จำเป็นด้วย โดยอัตโนมัติ
คอนฟิกสร้าง Kubernetes Master Node
ในที่นี้จะคอนฟิกเครื่อง node1 ให้ทำหน้าที่เป็น Master Node ของ Kubernetes
รันคำสั่ง kubeadm init บนเครื่อง node1
หมายเหตุ –pod-network-cidr=10.244.0.0/16 เป็นการระบุหมายเลข Private Subnet ของ Pod ซึ่งค่า 10.224.0.0/16 เป็นค่าดีฟอลต์ของ Flannel
alice@node1:~$ sudo kubeadm init \
    --pod-network-cidr=10.244.0.0/16

[init] using Kubernetes version: v1.11.2
[preflight] running pre-flight checks
I0909 21:10:44.712656 2267 kernel_validator.go:81] Validating kernel version
I0909 21:10:44.713699 2267 kernel_validator.go:96] Validating kernel config
          [WARNING SystemVerification]: docker version is greater than the most recently validated version. Docker version: 18.06.1-ce. Max validated version: 17.03
[preflight/images] Pulling images required for setting up a Kubernetes cluster
[preflight/images] This might take a minute or two, depending on the speed of your internet connection
[preflight/images] You can also perform this action in beforehand using 'kubeadm config images pull'
[kubelet] Writing kubelet environment file with flags to file "/var/lib/kubelet/kubeadm-flags.env"
[kubelet] Writing kubelet configuration to file "/var/lib/kubelet/config.yaml"
[preflight] Activating the kubelet service
[certificates] Generated ca certificate and key.
[certificates] Generated apiserver certificate and key.
[certificates] apiserver serving cert is signed for DNS names [node1 kubernetes kubernetes.default kubernetes.default.svc kubernetes.default.svc.cluster.local] and IPs [10.96.0.1 192.168.1.101]
[certificates] Generated apiserver-kubelet-client certificate and key.
[certificates] Generated sa key and public key.
[certificates] Generated front-proxy-ca certificate and key.
[certificates] Generated front-proxy-client certificate and key.
[certificates] Generated etcd/ca certificate and key.
[certificates] Generated etcd/server certificate and key.
[certificates] etcd/server serving cert is signed for DNS names [node1 localhost] and IPs [127.0.0.1 ::1]
[certificates] Generated etcd/peer certificate and key.
[certificates] etcd/peer serving cert is signed for DNS names [node1 localhost] and IPs [192.168.1.101 127.0.0.1 ::1]
[certificates] Generated etcd/healthcheck-client certificate and key.
[certificates] Generated apiserver-etcd-client certificate and key.
[certificates] valid certificates and keys now exist in "/etc/kubernetes/pki"
[kubeconfig] Wrote KubeConfig file to disk: "/etc/kubernetes/admin.conf"
[kubeconfig] Wrote KubeConfig file to disk: "/etc/kubernetes/kubelet.conf"
[kubeconfig] Wrote KubeConfig file to disk: "/etc/kubernetes/controller-manager.conf"
[kubeconfig] Wrote KubeConfig file to disk: "/etc/kubernetes/scheduler.conf"
[controlplane] wrote Static Pod manifest for component kube-apiserver to "/etc/kubernetes/manifests/kube-apiserver.yaml"
[controlplane] wrote Static Pod manifest for component kube-controller-manager to "/etc/kubernetes/manifests/kube-controller-manager.yaml"
[controlplane] wrote Static Pod manifest for component kube-scheduler to "/etc/kubernetes/manifests/kube-scheduler.yaml"
[etcd] Wrote Static Pod manifest for a local etcd instance to "/etc/kubernetes/manifests/etcd.yaml"
[init] waiting for the kubelet to boot up the control plane as Static Pods from directory "/etc/kubernetes/manifests"
[init] this might take a minute or longer if the control plane images have to be pulled
[apiclient] All control plane components are healthy after 42.504185 seconds
[uploadconfig] storing the configuration used in ConfigMap "kubeadm-config" in the "kube-system" Namespace
[kubelet] Creating a ConfigMap "kubelet-config-1.11" in namespace kube-system with the configuration for the kubelets in the cluster
[markmaster] Marking the node node1 as master by adding the label "node-role.kubernetes.io/master=''"
[markmaster] Marking the node node1 as master by adding the taints [node-role.kubernetes.io/master:NoSchedule]
[patchnode] Uploading the CRI Socket information "/var/run/dockershim.sock" to the Node API object "node1" as an annotation
[bootstraptoken] using token: jtadhb.cv1o6qi62g1n85s9
[bootstraptoken] configured RBAC rules to allow Node Bootstrap tokens to post CSRs in order for nodes to get long term certificate credentials
[bootstraptoken] configured RBAC rules to allow the csrapprover controller automatically approve CSRs from a Node Bootstrap Token
[bootstraptoken] configured RBAC rules to allow certificate rotation for all node client certificates in the cluster
[bootstraptoken] creating the "cluster-info" ConfigMap in the "kube-public" namespace
[addons] Applied essential addon: CoreDNS
[addons] Applied essential addon: kube-proxy

Your Kubernetes master has initialized successfully!

To start using your cluster, you need to run the following as a regular user:

   mkdir -p $HOME/.kube
   sudo cp -i /etc/kubernetes/admin.conf $HOME/.kube/config
   sudo chown $(id -u):$(id -g) $HOME/.kube/config

You should now deploy a pod network to the cluster.
Run "kubectl apply -f [podnetwork].yaml" with one of the options listed at:
  https://kubernetes.io/docs/concepts/cluster-administration/addons/

You can now join any number of machines by running the following on each node
as root:

  kubeadm join 192.168.1.101:6443 --token jtadhb.cv1o6qi62g1n85s9 --discovery-token-ca-cert-hash sha256:ffd679b0444cb1d8dd67dab42e232c9981f7bed0769f0c86404e4847342e6982
ผลลัพธ์ที่ได้ มีข้อความแสดงว่าตอนนี้ Kubernetes master ได้ถูกสร้างเรียบร้อยแล้ว
ข้อความที่ได้จากการการรันคำสั่ง kubeadm init ค่อนข้างสำคัญ โดยเฉพาะคำสั่งที่จะใช้รันบนเครื่องอื่น เพื่อเข้าร่วม (join) Kubernetes Cluster ที่เครื่องนี้ทำหน้าที่เป็น Master Node อยู่
รันคำสั่งตามที่แสดงในข้อความ บนเครื่อง node1
alice@node1:~$ mkdir -p $HOME/.kube

alice@node1:~$ sudo cp -i /etc/kubernetes/admin.conf \
    $HOME/.kube/config

alice@node1:~$ sudo chown $(id -u):$(id -g) $HOME/.kube/config
ลำดับต่อไป เลือกการติดตั้ง Addons เพื่อจะคอนฟิกเน็ตเวิร์ก ในที่นี้ขอเลือกแบบ Flannel
alice@node1:~$ kubectl apply -f \ https://raw.githubusercontent.com/coreos/flannel/master/Documentation/kube-flannel.yml
รอเวลาสักพัก ลองรันคำสั่งแสดงรายชื่อ nodes
alice@node1:~$ kubectl get nodes
NAME      STATUS    ROLES     AGE       VERSION
node1     Ready     master    11m       v1.11.2
ตอนนี้เรามี Kubernetes Cluster แล้ว แต่ยังมีแค่เครื่องเดียวที่เป็นสมาชิกคือเครื่อง node1 ที่ทำหน้าที่เป็น Master Node
เข้าร่วม (join) Kubernetes Cluster
บนเครื่องอื่นๆ ในที่นี้คือเครื่อง node2, node3 ให้รันคำสั่ง kubeadm join ตามด้วยออปชันที่ระบุจากผลลัพธ์ kubeadm init ในหัวข้อที่แล้ว เพื่อเข้าร่วม (join) Kubernetes Cluster
ตัวอย่างการรันคำสั่ง kubeadm join บนเครื่อง node2
alice@node2:~$ sudo kubeadm join 192.168.1.101:6443 --token jtadhb.cv1o6qi62g1n85s9 --discovery-token-ca-cert-hash sha256:ffd679b0444cb1d8dd67dab42e232c9981f7bed0769f0c86404e4847342e6982

[preflight] running pre-flight checks
           [WARNING RequiredIPVSKernelModulesAvailable]: the IPVS proxier will not be used, because the following required kernel modules are not loaded: [ip_vs ip_vs_rr ip_vs_wrr ip_vs_sh] or no builtin kernel ipvs support: map[nf_conntrack_ipv4:{} ip_vs:{} ip_vs_rr:{} ip_vs_wrr:{} ip_vs_sh:{}]
you can solve this problem with following methods:
1. Run 'modprobe -- ' to load missing kernel modules;
2. Provide the missing builtin kernel ipvs support

I0909 21:29:38.874595 5589 kernel_validator.go:81] Validating kernel version
I0909 21:29:38.875103 5589 kernel_validator.go:96] Validating kernel config
         [WARNING SystemVerification]: docker version is greater than the most recently validated version. Docker version: 18.06.1-ce. Max validated version: 17.03
[discovery] Trying to connect to API Server "192.168.1.101:6443"
[discovery] Created cluster-info discovery client, requesting info from "https://192.168.1.101:6443"
[discovery] Requesting info from "https://192.168.1.101:6443" again to validate TLS against the pinned public key
[discovery] Cluster info signature and contents are valid and TLS certificate validates against pinned roots, will use API Server "192.168.1.101:6443"
[discovery] Successfully established connection with API Server "192.168.1.101:6443"
[kubelet] Downloading configuration for the kubelet from the "kubelet-config-1.11" ConfigMap in the kube-system namespace
[kubelet] Writing kubelet configuration to file "/var/lib/kubelet/config.yaml"
[kubelet] Writing kubelet environment file with flags to file "/var/lib/kubelet/kubeadm-flags.env"
[preflight] Activating the kubelet service
[tlsbootstrap] Waiting for the kubelet to perform the TLS Bootstrap...
[patchnode] Uploading the CRI Socket information "/var/run/dockershim.sock" to the Node API object "node2" as an annotation

This node has joined the cluster:
* Certificate signing request was sent to master and a response
was received.
* The Kubelet was informed of the new secure connection details.

Run 'kubectl get nodes' on the master to see this node join the cluster.
บนเครื่อง node1 ที่ทำหน้าที่ Master Node ลองรันคำสั่ง เพื่อแสดงรายชื่อ node ที่อยู่ใน Kubernetes Cluster
alice@node1:~$ kubectl get nodes
NAME      STATUS    ROLES     AGE       VERSION
node1     Ready     master    18m       v1.11.2
node2     Ready     <none>    1m        v1.11.2
จะเห็นชื่อเครื่อง node2 เข้าเป็นสมาชิกแล้ว
หมายเหตุ อาจต้องรอเวลาสักพัก เพื่อให้ node2 ขึ้นสถานะ Ready
ตัวอย่างการรันคำสั่ง kubeadm join บนเครื่อง node3
alice@node3:~$ sudo kubeadm join 192.168.1.101:6443 --token jtadhb.cv1o6qi62g1n85s9 --discovery-token-ca-cert-hash sha256:ffd679b0444cb1d8dd67dab42e232c9981f7bed0769f0c86404e4847342e6982

[preflight] running pre-flight checks
           [WARNING RequiredIPVSKernelModulesAvailable]: the IPVS proxier will not be used, because the following required kernel modules are not loaded: [ip_vs ip_vs_rr ip_vs_wrr ip_vs_sh] or no builtin kernel ipvs support: map[ip_vs_wrr:{} ip_vs_sh:{} nf_conntrack_ipv4:{} ip_vs:{} ip_vs_rr:{}]
you can solve this problem with following methods:
1. Run 'modprobe -- ' to load missing kernel modules;
2. Provide the missing builtin kernel ipvs support

I0909 21:32:14.248802 4933 kernel_validator.go:81] Validating kernel version
I0909 21:32:14.255227 4933 kernel_validator.go:96] Validating kernel config
         [WARNING SystemVerification]: docker version is greater than the most recently validated version. Docker version: 18.06.1-ce. Max validated version: 17.03
[discovery] Trying to connect to API Server "192.168.1.101:6443"
[discovery] Created cluster-info discovery client, requesting info from "https://192.168.1.101:6443"
[discovery] Requesting info from "https://192.168.1.101:6443" again to validate TLS against the pinned public key
[discovery] Cluster info signature and contents are valid and TLS certificate validates against pinned roots, will use API Server "192.168.1.101:6443"
[discovery] Successfully established connection with API Server "192.168.1.101:6443"
[kubelet] Downloading configuration for the kubelet from the "kubelet-config-1.11" ConfigMap in the kube-system namespace
[kubelet] Writing kubelet configuration to file "/var/lib/kubelet/config.yaml"
[kubelet] Writing kubelet environment file with flags to file "/var/lib/kubelet/kubeadm-flags.env"
[preflight] Activating the kubelet service
[tlsbootstrap] Waiting for the kubelet to perform the TLS Bootstrap...
[patchnode] Uploading the CRI Socket information "/var/run/dockershim.sock" to the Node API object "node3" as an annotation

This node has joined the cluster:
* Certificate signing request was sent to master and a response
was received.
* The Kubelet was informed of the new secure connection details.

Run 'kubectl get nodes' on the master to see this node join the cluster.
ตัวอย่างการรันคำสั่งบนเครื่อง node1 แสดงรายชื่อ node ที่อยู่ใน Kubernetes Cluster
alice@node1:~$ kubectl get nodes
NAME      STATUS    ROLES     AGE       VERSION
node1     Ready     master    19m       v1.11.2
node2     Ready     <none>    3m        v1.11.2
node3     Ready     <none>    32s       v1.11.2
ทดลองรัน Nginx Web Server
บนเครื่อง node1 ที่ทำหน้าที่เป็น Master node รันคำสั่ง kubectl run เพื่อสั่งรัน docker image ใน kubernetes
alice@node1:~$ kubectl run nginx --image=nginx --port 80
deployment.apps/nginx created
ตัวอย่างสถานะของ deployments และ services
alice@node1:~$ kubectl get deployments
NAME    DESIRED   CURRENT   UP-TO-DATE   AVAILABLE    AGE
nginx   1         1         1            1            7s

alice@node1:~$ kubectl get services
NAME        TYPE       CLUSTER-IP  EXTERNAL-IP  PORT(S)  AGE
kubernetes  ClusterIP  10.96.0.1   <none>       443/TCP  40m
รัน kubectl expose เพื่อรันเซอร์วิสเปิดพอร์ตสู่ภายนอก
alice@node1:~$ kubectl expose deploy nginx --port 80 --target-port 80 --type NodePort
service/nginx exposed
ใช้คำสั่ง kubectl get services เพื่อแสดงรายชื่อ services ที่รันอยู่
alice@node1:~$ kubectl get services
NAME TYPE CLUSTER-IP EXT.. PORT(S) AGE
kubernetes ClusterIP 10.96.0.1 <none> 443/TCP 41m
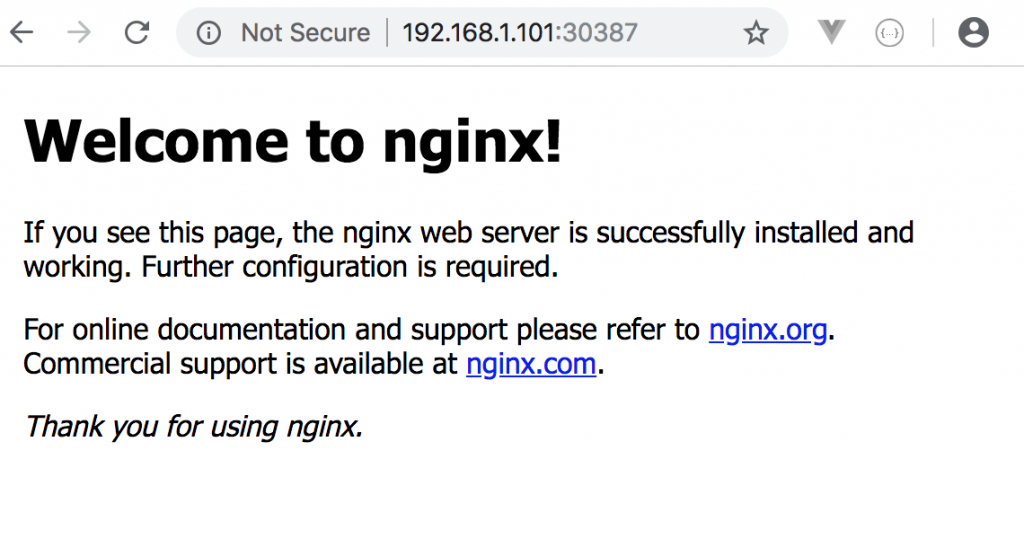
nginx NodePort 10.101.235.133 <none> 80:30387/TCP 2s
ทดลองเปิดด้วย browser โดยระบุที่อยู่เป็น http://192.168.1.101:30387 ก็จะเห็นข้อความของ nginx
ถ้าต้องการทราบว่า nginx นี้รันอยู่บนเครื่องไหน ทำได้โดยใช้คำสั่ง kubectl get pods โดยต้องระบุออปชัน -o wide เพื่อแสดงผลลัพธ์มากขึ้น
alice@node1:~$ kubectl get pods -o wide
NAME           READY STATUS   RESTARTS AGE IP          NODE ...
nginx-6f85...  1/1   Running   0       6m  10.244.1.3  node2
เช่นตัวอย่างนี้รันอยู่บนเครื่อง node2
alice@node2:~$ docker container ls
CONTAINER ID   IMAGE    COMMAND                CREATED
60cc984755b6   nginx    "nginx -g 'daemon of…" 4 minutes
...
หลังจากทดสอบ nginx เรียบร้อยแล้ว หากต้องการยกเลิกการรัน สามารถทำได้โดย รันคำสั่งดังต่อไปนี้
alice@node1:~$ kubectl delete service nginx
service "nginx" deleted

alice@node1:~$ kubectl delete deployment nginx
deployment.extensions "nginx" deleted
ถ้าลองรันคำสั่ง docker บนเครื่อง node2 ดู ก็จะไม่มี container ชื่อ nginx รันอยู่แล้ว