ที่จริงแล้วมีคนสร้าง Vagrant box เป็นแบบ public ให้เราสามารถดาวน์โหลดมาใช้งานได้ที่ Public Vagrant Box โดยมีระบบปฏิบัติการอยู่หลายเวอร์ชัน
แต่ในบางครั้ง เราอาจจำเป็นต้องสร้างขึ้นมาเอง เพื่อให้เหมาะกับองค์กร หรือการทำงานในทีมของเราเอง
ในที่นี้จะแสดงขั้นตอนการใช้ vagrant เพื่อสร้างแพ็คเกจเป็น box ขึ้นมาใช้งานเอง โดยจะใช้โปรแกรม VirtualBox เพื่อสร้างเครื่องเสมือน ติดตั้ง CentOS 7
ขั้นตอนคร่าวๆ เริ่มต้นด้วยการติดตั้ง CentOS 7 ในเครื่องเสมือน แล้วติดตั้งโปรแกรมหรือคอนฟิกค่าต่างๆ ตามที่เราต้องการ แล้วใช้คำสั่ง vagrant จัดเป็นชุดแพ็คเกจ ที่เรียกว่า Vagrant Box เพื่อให้คนอื่นๆ สามารถนำไปใช้งานได้ ด้วยคอนฟิกหรือสภาพแวดล้อมเดียวกัน
เตรียมความพร้อมเครื่องเสมือน (guest)
vagrant มีข้อกำหนดในการติดตั้งเครื่องเสมือน เพื่อใช้สร้าง box ดังนี้
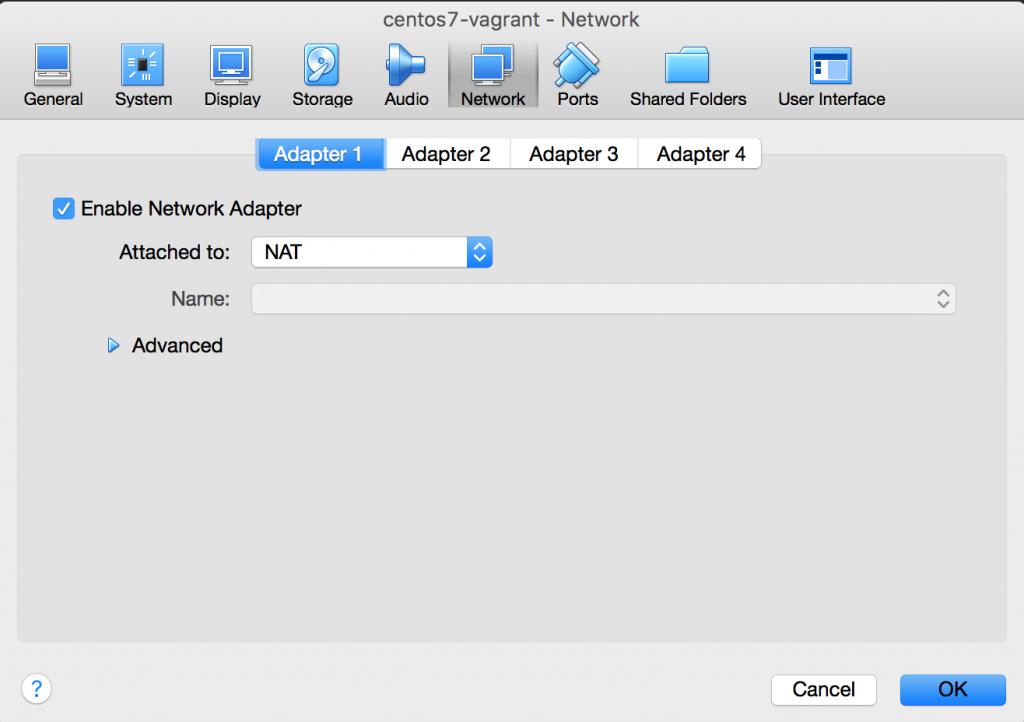
ตอนคอนฟิกสร้างเครื่องเสมือน (guest) ใน VirtualBox ต้องคอนฟิก Network Adapter 1 ให้เชื่อมต่อแบบ NAT
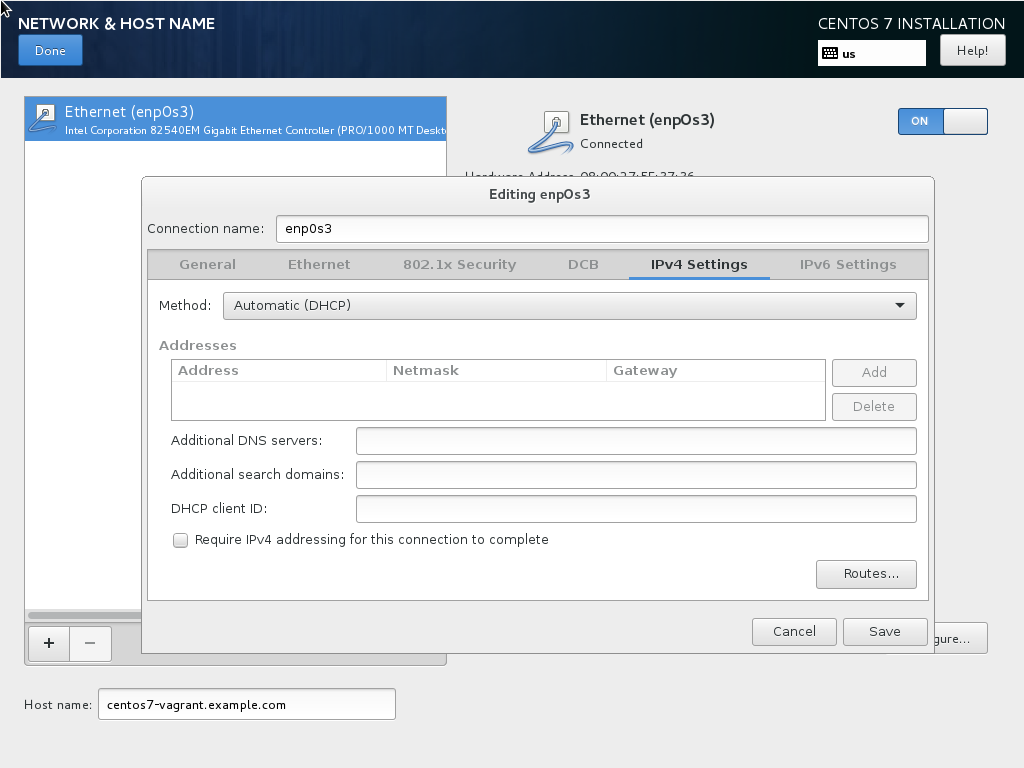
ตอนติดตั้งให้คอนฟิก Network เป็นแบบ DHCP
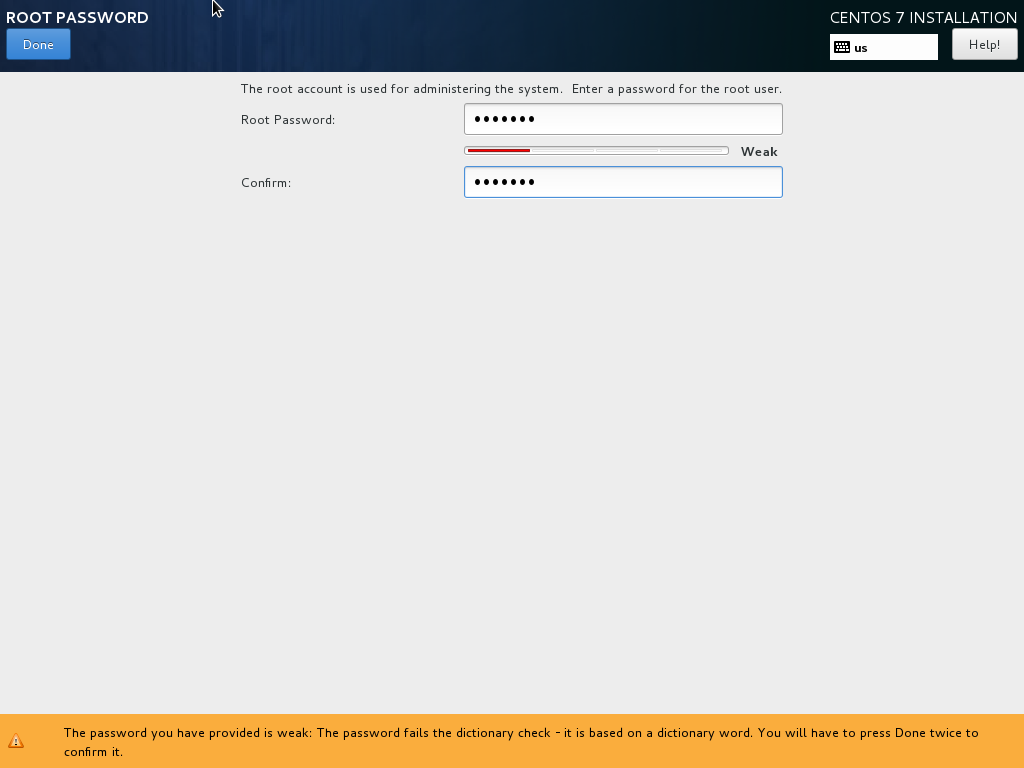
เพื่อความสะดวกให้กับคนที่นำ box ที่เราสร้างไปใช้งาน แนะนำให้ตั้งรหัสผ่านของ root ให้เป็น vagrant
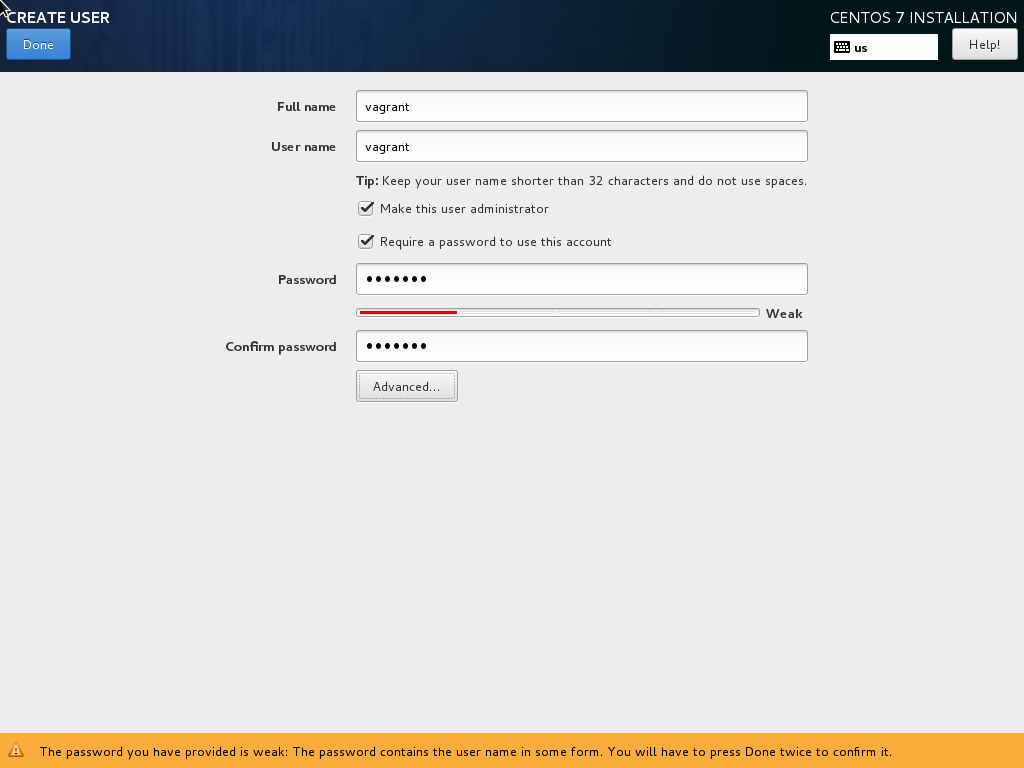
สร้างชื่อผู้ใช้งาน vagrant ตั้งรหัสผ่านให้เป็น vagrant ด้วย พร้อมอนุญาตให้ vagrant สามารถรัน sudo เพื่อใช้สิทธิ์ root ได้
ตัวอย่างตอนติดตั้ง CentOS 7 ต้องคลิกเลือก [x] Make this user administrator เพื่อให้ vagrant รัน sudo เพื่อใช้สิทธิ์ root ได้
หลังการติดตั้งระบบปฎิบัติการเสร็จ สำหรับเครื่องเสมือนที่สร้างโดย VirtualBox ต้องติดตั้ง Guest Additions
ดูวิธีการได้ที่
ติดตั้ง VirtualBox Guest Additions บน CentOS 7
คอนฟิกชื่อผู้ใช้ “vagrant”
เพื่อให้คำสั่ง vagrant สามารถ ssh เข้ามาที่ box โดยไม่ต้องระบุรหัสผ่าน (password) ต้องใส่ insecure keypair ไว้ในไฟล์ ~/.ssh/authorized_keys ของชื่อผู้ใช้ vagrant
ในเครื่องเสมือน (guest) ล็อกอินด้วย vagrant สร้างไดเรกทอรี .ssh และสร้างไฟล์ authorized_keys พร้อมกำหนด permission
[vagrant@centos7 ~]$ mkdir .ssh
[vagrant@centos7 ~]$ chmod 700 .ssh/

[vagrant@centos7 ~]$ touch .ssh/authorized_keys
[vagrant@centos7 ~]$ chmod 600 .ssh/authorized_keys
โดย insecure keypair สามารถดาวน์โหลดได้ที่
https://github.com/mitchellh/vagrant/tree/master/keys

คลิกไฟล์ vagrant.pub แล้ว copy คีย์ ไปใส่ไว้ในไฟล์ ~/.ssh/authorized_keys
ตัวอย่างการใช้ vi เพื่อใส่คีย์ลงไปในไฟล์ .ssh/authorized_keys
[vagrant@centos7 ~]$ vi .ssh/authorized_keys
ssh-rsa AAAAB3NzaC1yc2EAAAABIwAAAQEA6NF8iallvQVp22WDkTkyrtvp9eWW6A8YVr+kz4TjGYe7gHzIw+niNltGEFHzD8+v1I2YJ6oXevct1YeS0o9HZyN1Q9qgCgzUFtdOKLv6IedplqoPkcmF0aYet2PkEDo3MlTBckFXPITAMzF8dJSIFo9D8HfdOV0IAdx4O7PtixWKn5y2hMNG0zQPyUecp4pzC6kivAIhyfHilFR61RGL+GPXQ2MWZWFYbAGjyiYJnAmCP3NOTd0jMZEnDkbUvxhMmBYSdETk1rRgm+R4LOzFUGaHqHDLKLX+FIPKcF96hrucXzcWyLbIbEgE98OHlnVYCzRdK8jlqm8tehUc9c9WhQ== vagrant insecure public key
กำหนดให้ผู้ใช้งาน vagrant สามารถรัน sudo เพื่อใช้สิทธิ์ root โดยไม่ต้องใส่รหัสผ่าน (passwordless)
ใช้ root หรือ sudo รันคำสั่ง visudo เพื่อเพิ่มบรรทัด “vagrant ALL=(ALL) NOPASSWD: ALL”
[vagrant@centos7 ~]$ sudo visudo
[sudo] password for vagrant:
...
## Allows people in group wheel to run all commands
%wheel ALL=(ALL) ALL

## Allows vagrant to run all commands without password
vagrant ALL=(ALL) NOPASSWD: ALL
...
คอนฟิก SSH
เพื่อให้ ssh เข้ามาใน box ได้เร็วขึ้น แนะนำให้คอนฟิก UseDNS ให้เป็น no
[vagrant@centos7 ~]$ sudo vi /etc/ssh/sshd_config
...
UseDNS no
...
ปิดเครื่องเสมือนด้วยคำสั่ง shutdown -h
[vagrant@centos7 ~]$ sudo shutdown -h now
สร้าง Vagrant Box
บนเครื่องหลัก host เช่นในที่นี้คือเครื่อง Mac เปิดโปรแกรม Terminal
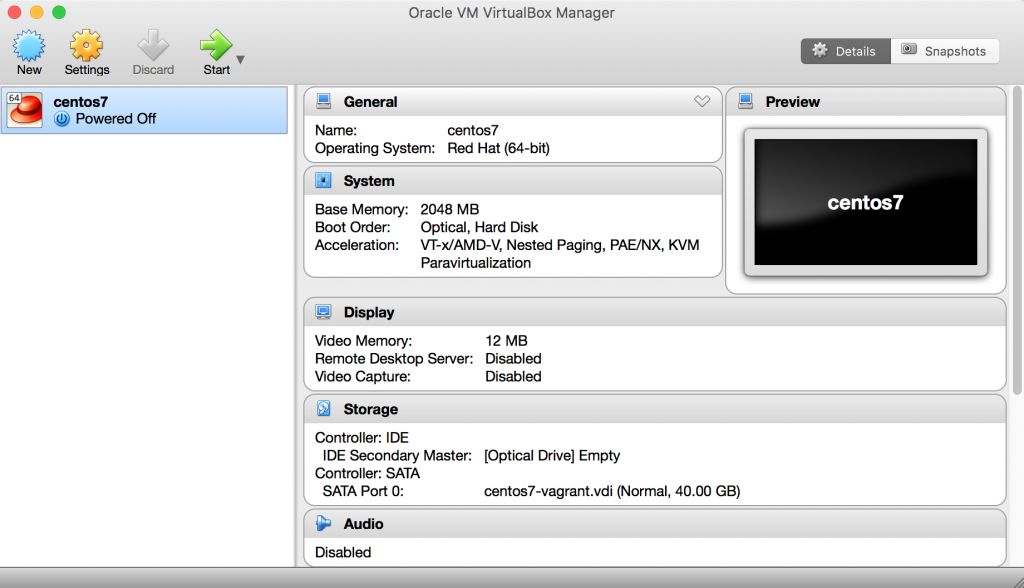
ใช้คำสั่ง VBoxManage list vms เพื่อดูรายชื่อเครื่องเสมือนที่มีอยู่
[alice@MacOS ~]$ VBoxManage list vms
"centos7" {...}
รายชื่อจะตรงกับหน้าจอของโปรแกรม VirtualBox
ใช้คำสั่ง vagrant package เพื่อ export เครื่องเสมือนจาก VirtualBox สร้างเป็นไฟล์แพ็คเกจ package.box
ต้องระบุชื่อให้ตรงกับชื่อใน VirtualBox เช่นในที่นี้คือ centos7
[alice@MacOS ~]$ vagrant package --base centos7
==> centos7: Exporting VM...
==> centos7: Compressing package to: /Users/alice/package.box
ตัวอย่างไฟล์ที่ได้
[alice@MacOS ~]$ ls -l package.box
-rw-r--r-- 1 alice staff 679277907 May 6 13:42 package.box
เราต้องเพิ่มไฟล์ที่ได้นี้เข้าไปในรายชื่อ box ของ vagrant
ลองใช้คำสั่ง vagrant box list เพื่อแสดงรายชือ box ที่มีอยู่
โดยเริ่มต้นจะไม่มี box ใดใน vagrant เลย
[alice@MacOS ~]$ vagrant box list
There are no installed boxes! Use `vagrant box add` to add some.
ใช้คำสั่ง vagrant box add เพื่อเพิ่มไฟล์แพ็คเกจที่ได้ เข้าไปในรายชื่อ box ของ vagrant
[alice@MacOS ~]$ vagrant box add centos7 package.box
==> box: Box file was not detected as metadata. Adding it directly...
==> box: Adding box 'centos7' (v0) for provider:
    box: Unpacking necessary files from: file:///Users/alice/package.box
==> box: Successfully added box 'centos7' (v0) for 'virtualbox'!
ลองดูรายชื่อ box อีกครั้ง จะมีชื่อ centos7 เพิ่มขึ้นมา
[alice@MacOS ~]$ vagrant box list
centos7 (virtualbox, 0)
สร้างและเปิดเครื่องเสมือนด้วย vagrant up
สร้างไดเรกทอรี vagrant.test1 ขึ้นมา
[alice@MacOS ~]$ mkdir vagrant.test1
[alice@MacOS ~]$ cd vagrant.test1/
ใช้คำสั่ง vagrant init ตามด้วยชื่อ box เพื่อสร้างไฟล์ Vagrantfile สำหรับสร้างเครื่องเสมือนใหม่ โดยอิง (base) จาก box ที่เราเพิ่งสร้างขึ้น
[alice@MacOS vagrant.test1]$ vagrant init centos7
A `Vagrantfile` has been placed in this directory. You are now
ready to `vagrant up` your first virtual environment! Please read
the comments in the Vagrantfile as well as documentation on
`vagrantup.com` for more information on using Vagrant.
ผลลัพธ์จะได้ไฟล์ Vagrantfile
[alice@MacOS vagrant.test1]$ ls -l
total 8
-rw-r--r-- 1 alice staff 3019 May 6 13:49 Vagrantfile
ตัวอย่างไฟล์ Vagrantfile (ตัด comment ออก)
[alice@MacOS vagrant.test1]$ vi Vagrantfile
Vagrant.configure(2) do |config|
    config.vm.box = "centos7"
end
รันคำสั่ง vagrant up เพื่อสร้างเครื่องเสมือน
[alice@MacOS vagrant.test1]$ vagrant up
Bringing machine 'default' up with 'virtualbox' provider...
==> default: Importing base box 'centos7'...
==> default: Matching MAC address for NAT networking...
==> default: Setting the name of the VM: vagranttest1_default_1462517494922_4494
==> default: Clearing any previously set network interfaces...
==> default: Preparing network interfaces based on configuration...
    default: Adapter 1: nat
==> default: Forwarding ports...
    default: 22 (guest) => 2222 (host) (adapter 1)
==> default: Booting VM...
==> default: Waiting for machine to boot. This may take a few minutes...
    default: SSH address: 127.0.0.1:2222
    default: SSH username: vagrant
    default: SSH auth method: private key
    default: Warning: Remote connection disconnect. Retrying...
    default: Warning: Remote connection disconnect. Retrying...
    default:
    default: Vagrant insecure key detected. Vagrant will automatically replace
    default: this with a newly generated keypair for better security.
    default:
    default: Inserting generated public key within guest...
    default: Removing insecure key from the guest if it's present...
    default: Key inserted! Disconnecting and reconnecting using new SSH key...
==> default: Machine booted and ready!
==> default: Checking for guest additions in VM...
==> default: Mounting shared folders...
 default: /vagrant => /Users/alice/vagrant.test1
 The following SSH command responded with a non-zero exit status.
 Vagrant assumes that this means the command failed!

mkdir -p /vagrant

Stdout from the command:

Stderr from the command:

sudo: sorry, you must have a tty to run sudo
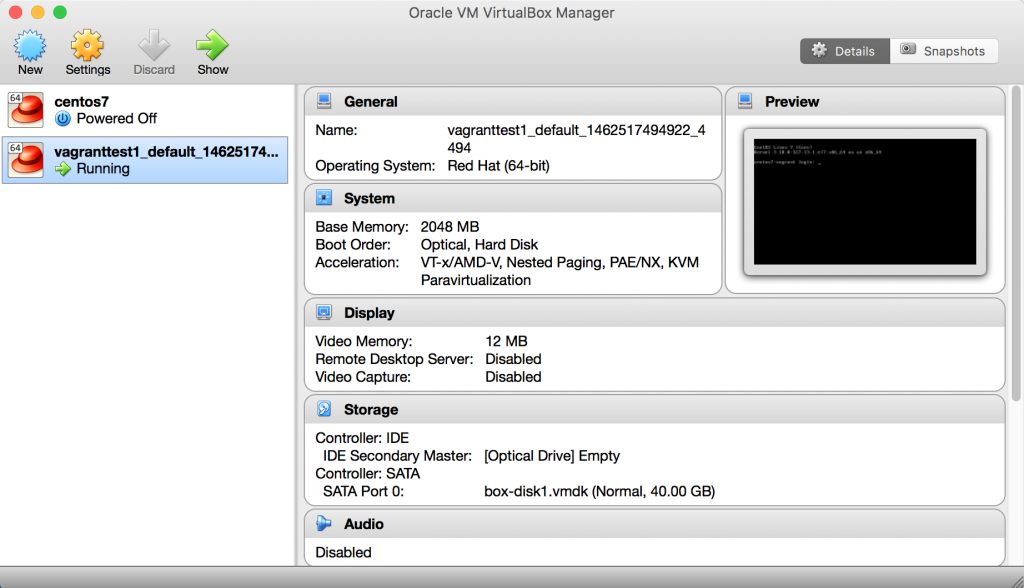
คำสั่ง vagrant up จะทำการสร้างเครื่องเสมือนขึ้นมาใหม่ พร้อมเปิดเครื่องเสมือนนี้ขึ้นมา
ถ้าใช้คำสั่ง VBoxManage list vms หรือดูโปรแกรม VirtualBox จะเห็นว่ามีเครื่องเสมือนเพิ่มขึ้นมาอีกเครื่อง
[alice@MacOS vagrant.test1]$ VBoxManage list vms
"centos7" {...}
"vagranttest1_default_1462517494922_4494" {...}
เราสามารถใช้คำสั่ง vagrant ssh เพื่อล็อกอินเข้าเครื่องเสมือนที่สร้างขึ้นได้โดยตรง
[alice@MacOS vagrant.test1]$ vagrant ssh
Last login: Fri May 6 13:28:06 2016 from 192.168.56.1
[vagrant@centos7 ~]$
ลองรัน sudo เพื่อเป็น root ก็สามารถทำได้
[vagrant@centos7 ~]$ sudo su -
Last login: Fri May 6 13:34:55 ICT 2016 on tty1
[root@centos7 ~]#
แต่จากการรันคำสั่ง vagrant up จะเห็นว่ามีข้อผิดพลาด (error) อยู่
The following SSH command responded with a non-zero exit status.
 Vagrant assumes that this means the command failed!

mkdir -p /vagrant

Stdout from the command:

Stderr from the command:

sudo: sorry, you must have a tty to run sudo
ข้อผิดพลาดนี้สามารถแก้ไขโดยใส่เครื่องหมาย # นำหน้าบรรทัด Defaults requiretty
[vagrant@centos7 ~]$ sudo visudo
...
#
# Disable "ssh hostname sudo <cmd>", because it will show the password in clear.
# You have to run "ssh -t hostname sudo <cmd>".
#
#Defaults requiretty
...
ใช้คำสั่ง shutdown เพื่อเปิดเครื่อง
[vagrant@centos7 ~]$ sudo shutdown -h now
บนเครื่อง host รันคำสั่ง vagrant up อีกครั้ง
ก็จะไม่มีข้อผิดพลาดแสดงขึ้นมาอีก
[alice@MacOS vagrant.test1]$ vagrant up
Bringing machine 'default' up with 'virtualbox' provider...
==> default: Clearing any previously set forwarded ports...
==> default: Clearing any previously set network interfaces...
==> default: Preparing network interfaces based on configuration...
    default: Adapter 1: nat
==> default: Forwarding ports...
 default: 22 (guest) => 2222 (host) (adapter 1)
==> default: Booting VM...
==> default: Waiting for machine to boot. This may take a few minutes...
    default: SSH address: 127.0.0.1:2222
    default: SSH username: vagrant
    default: SSH auth method: private key
    default: Warning: Remote connection disconnect. Retrying...
    default: Warning: Remote connection disconnect. Retrying...
    default: Warning: Remote connection disconnect. Retrying...
==> default: Machine booted and ready!
==> default: Checking for guest additions in VM...
==> default: Mounting shared folders...
 default: /vagrant => /Users/alice/vagrant.test1
โดยดีฟอลต์ vagrant จะคอนฟิก shared folder โดยจะ mount ไดเรกทอรีที่รันคำสั่ง vagrant up เข้ากับ /vagrant ในเครื่องเสมือน เพื่อแชร์ไฟล์ระหว่างเครื่องโดยอัตโนมัติ
หมายเหตุ การแชร์ไฟล์ระหว่างเครื่องหลักและเครื่องเสมือน (shared folder) เป็นคุณสมบัติของ VirtualBox
ลองล็อกอินเข้าเครื่องเสมือน
[alice@MacOS vagrant.test1]$ vagrant ssh
Last login: Fri May 6 14:30:20 2016 from 10.0.2.2
ดูไฟล์ในไดเรกทอรี /vagrant/
[vagrant@centos7 ~]$ ls -l /vagrant/
total 4
-rw-r--r--. 1 vagrant vagrant 3019 May 6 13:49 Vagrantfile
ทดลองสร้างไฟล์ในไดเรกทอรีนี้
[vagrant@centos7 ~]$ echo "hello" > /vagrant/hello.txt
ใช้คำสั่ง exit เพื่อออกจากเครื่องเสมือน
[vagrant@centos7 ~]$ exit
ลองดูไฟล์บนเครื่องหลัก (host) ก็จะเห็นไฟล์ที่ถูกสร้างขึ้นในเครื่องเสมือน
[alice@MacOS vagrant.test1]$ ls -l
total 16
-rw-r--r-- 1 alice staff  3019 May  6 13:49 Vagrantfile
-rw-r--r-- 1 alice staff     6 May  6 14:30 hello.txt

[alice@MacOS vagrant.test1]$ cat hello.txt
hello
ดูสถานะเครื่องเสมือนด้วย vagrant status
สามารถใช้คำสั่ง vagrant status เพื่อดูสถานะได้
[alice@MacOS vagrant.test1]$ vagrant status
 Current machine states:

default                   poweroff (virtualbox)

The VM is powered off. To restart the VM, simply run `vagrant up`
ปิดเครื่องเสมือนด้วย vagrant halt
เราสามารถสั่งปิดเครื่องเสมือนได้ ด้วยคำสั่ง vagrant halt
[alice@MacOS vagrant.test1]$ vagrant halt
==> default: Attempting graceful shutdown of VM...
ลบเครื่องเสมือนด้วย vagrant destroy
ถ้าต้องการลบเครื่องเสมือน สามารถใช้คำสั่ง vagrant destroy
คำเตือน : ไม่สามารถกู้ข้อมูลในเครื่องเสมือนที่ลบนี้กลับได้
[alice@MacOS vagrant.test1]$ vagrant destroy
    default: Are you sure you want to destroy the 'default' VM? [y/N] y
==> default: Destroying VM and associated drives...
ถ้าดูด้วยคำสั่ง VBoxManage ก็จะเหลือเครื่องเสมือน centos7 ที่เราสร้างไว้ตั้งแต่ตอนแรก
[alice@MacOS vagrant.test1]$ VBoxManage list vms
"centos7" {...}
สรุป vagrant จะช่วยให้บริหารจัดการเครื่องเสมือน (guest) ได้ง่ายขึ้น